Planned finished item
One Unisub #5677 cork-backed hardboard coaster carrying the original sunrise sprig motif. This is a documented expected outcome; no finished physical sample is claimed.
Unisub #5677 white gloss cork-backed hardboard coaster
- Outside width
- 3.75 in
- Outside height
- 3.75 in
Artwork requirements
Start with the original 3-inch motif or use your own artwork within the measured coated face.
The supplied file is unmirrored. Mirror exactly once for this process, print at actual size, and measure the separate 1-inch square. Cut away labels and the square before pressing.
Check the actual coated face and centered motif
Confirm the actual blank is #5677 and dry-position the centered 3-inch design within its white coated face. The manufacturer lists 3.75 × 3.75-inch outside dimensions; those are not a measured maximum printable area. Do not enlarge this practice motif into a full-bleed template.
- Use the unmirrored original 3 × 3-inch SVG or the Letter PDF proof sheet linked in the notes. The 3-inch canvas is our design choice, not a supplier-measured usable area.
- Print the proof sheet at actual size and measure both outside edges of its separate 1-inch square. If either differs, correct scaling before heating.
- Mirror exactly once for this coated-front-face transfer. Cut away every label and the calibration square before pressing. Trim between the outside crop marks for a 3.75-inch square of paper centered around the 3-inch art and check its placement against your actual blank.
No third-party template, photo or font appears in the art-only SVG. The downloads include versioned use terms and an independent scale check.
The proof checks physical print scaling only. It is not an ICC target, a color guarantee, a press-temperature test or proof of a completed project.
Bill of materials
Gather these items before you begin. Required, optional, and included items are marked below. The listed example printer is one documented print path. Verify the ink, paper, software and blank instructions before substituting equipment; the press scope may be a class rather than an approved exact model.
- 2×
5677
Requiredblank
- 1×
Brother SP1 Sublimation Printer
Example printerprinter
- 1×
Brother SP01BKS Black Sublimation Ink Cartridge, 47 mL
Requiredink
Included with Brother SP1 Sublimation Printer.
- 1×
Brother SP01CS Cyan Sublimation Ink Cartridge, 47 mL
Requiredink
Included with Brother SP1 Sublimation Printer.
- 1×
Brother SP01MS Magenta Sublimation Ink Cartridge, 47 mL
Requiredink
Included with Brother SP1 Sublimation Printer.
- 1×
Brother SP01YS Yellow Sublimation Ink Cartridge, 47 mL
Requiredink
Included with Brother SP1 Sublimation Printer.
- 1×
Brother Sublimation Paper, Letter, 100 Sheets
Requiredpaper
- 1×
Generic requirement: Conventional flat heat press
Requiredpress
- 1×
Generic requirement: Protective blowout paper
Requiredaccessory
- 1×
Generic requirement: Lint-free cleaning cloth
Requiredaccessory
- 1×
Generic requirement: Protective heat gloves
Requiredaccessory
- 1×
Generic requirement: Heat-resistant tape
Requiredaccessory
- 1×
Generic requirement: Scissors
Requiredaccessory
Equipment
Press guidance by equipment class
These supplier instructions name a class or application; they do not verify a particular press model.
Conventional flat heat press — Unisub specifies a heat press but no exact model. The exact-item page scopes temperature to desktop-printer transfers; strong pressure is qualitative and settings may vary by equipment.
Source-scoped starting settings
dye sublimation
Conventional flat heat press
- Temperature
- 385 °F
- Time
- 60–70 seconds
- Pressure
- Strong pressure; settings may vary based on equipment
- Peel and transfer removal
- Remove the transfer paper immediately after pressing while wearing protective heat gloves.
- Cooling and handling
- Allow the coaster to cool after immediate paper removal. The manufacturer gives no timed cooling interval.
- Remove protective film and clean the coated face. Tape the printed image against the coating.
- Press coated face up, transfer above the coaster, with fresh protective blowout paper above and below.
- No numeric pressure, exact press-model validation or independent physical test is claimed.
Checked .
Ordered steps

Step 1
Gather two exact Unisub #5677 blanks, one for a first transfer and one for a repeat if needed. Use a conventional flat press with sufficient uninterrupted contact area for the complete coaster. The supplier gives class-level instructions, not a validated press SKU. Read your own press operating and heat-safety directions before setting it up; keep heat gloves ready. Use the Brother SP1 with its four genuine sublimation inks and SP01PL Letter paper for the print route below.
- Source: Brother International Corporation (U.S.): Consumables & Options | SP-1/SP-1W | United States
- Source: Brother International Corporation (U.S.): SP1 Sublimation Printer
- Source: Unisub / Universal Woods: Unisub HDF Square Coaster with Cork Back, 5677
- Source: Unisub / Universal Woods: How to Sublimate Coasters
Step 2
Open the supplied Letter PDF proof sheet. It contains unmirrored 3-inch artwork and a separate 1-inch square. In the Windows application print dialog choose Brother SP1, Letter, portrait, one page and one copy. Use actual size / 100% and disable fit-to-page. In the Brother driver, use Advanced > Mirror Print once; do not also flip the file. Reverse Print rotates 180 degrees and is not the mirror control. Load SP01PL in the tray with the printing face down, as Brother documents. The linked first-print guide walks through these controls.
Step 3
Before heating, measure the printed check square across its outside edges: width and height must each be 1 inch (25.4 mm). Correct the print scale and print again if either dimension differs. Confirm the output is reversed left-to-right once: the art-only preview has the sun on the right, so the printed transfer should have it on the left. Trim between the outside crop marks to keep a 3.75-inch square of transfer paper centered around the 3-inch artwork, removing the check square, crop marks and all labels. Dry-align it with your actual blank; this is a centered motif, not a full-bleed template.
Step 4
Remove any protective film from the coaster’s white face and wipe the face with a clean lint-free cloth. The current Unisub guide also permits all-purpose cleaner or compressed air for debris, but this simple clean-blank route uses the listed cloth. Place the print image-side up on a flat work surface, put the white face of the coaster against the image, align the edges, and secure the paper with two pieces of heat tape. Keep tape clear of the motif.
Step 5
Set the flat press to the manufacturer’s 385°F instruction. Its separate Celsius source label is 195°C. Use the supplier’s qualitative strong pressure; there is no documented numeric dial or pressure value. Choose and record a duration within Unisub’s published 60–70-second range for your first attempt. Do not substitute a midpoint as if the manufacturer prescribed it. Lay fresh blowout paper on the lower platen, then the coaster cork-side down with transfer above its white face, then another protective sheet on top. Press the complete coaster once.
Use the listed settings context.
Step 6
When the timed cycle ends, open the press and use protective heat gloves to remove the hot coaster. Following the exact #5677 instruction, remove the transfer paper immediately, without sliding it across the image, then allow the coaster to cool. Keep the hot item on a heat-safe work area specified by your press instructions and avoid bare-hand handling until it has cooled. The manufacturer specifies a cooling stage, not a number of minutes.
Use the listed settings context.
Step 7
Once cool, record the printed size, press model, selected duration, qualitative pressure, paper, ink and visible result. Compare orientation and visible detail with the original art. The screen image is not a color standard, and this site has no measured transfer result. Test a single piece before a batch; if the result is poor, check film removal, scale, alignment and contact first, then consult the source instructions rather than guessing a hotter or longer recipe.
Step 8
For routine care of the finished coated face, use a clean microfiber cloth and non-abrasive household cleaner while the coaster lies flat, decorated side up. This follows manufacturer-authored general hard-surface care. It does not establish that #5677 is dishwasher-safe, suitable for soaking, or independently durability-tested.
Completion checks
The exact #5677 blank, Brother SP1 ink/paper route and your actual flat-press model are recorded; no exact press pairing is claimed by this site.
The separate square measures 1 inch on both axes, the transfer was mirrored once, and all proof-sheet labels were removed from the transfer area.
Transfer stayed above the coated face between protective paper; the recorded duration is inside the source’s 60–70-second range at 385°F with qualitative strong pressure.
Protective gloves were used, transfer paper was removed immediately, and the coaster cooled before ordinary handling.
The result is your observed test record. The illustration and downloadable art are not evidence of a physical test by Make Press Repeat.
Troubleshooting
- Measure the one-inch square again and remove fit-to-page scaling.
- Confirm Mirror Print was selected once and Reverse Print was not mistaken for it.
- Stop before a batch. Check that protective film was removed and the coated face was clean.
- Check the two taped sides, transfer-on-top stack and complete flat-press contact.
- Record the actual duration and press model; ask the blank or press supplier before going outside the documented starting range.
Make one white, cork-backed Unisub #5677 coaster with a small sunrise sprig motif. The plan joins manufacturer blank instructions to a documented Brother SP1 print path. It is source-documented and has not been independently made or tested. The press instructions apply to a conventional flat heat press as a class; no exact press model has been verified with this combination.
Download the original artwork
Download the Letter PDF proof sheet, or use the editable 3-inch SVG artwork. The Letter SVG proof sheet is also available. Each proof sheet has the same unmirrored art and a separate 1-inch check square. Print at actual size, then cut away the check square and all labels before pressing. The 3-inch canvas is an editorial choice with white space around the motif, not a measured printable-area limit.
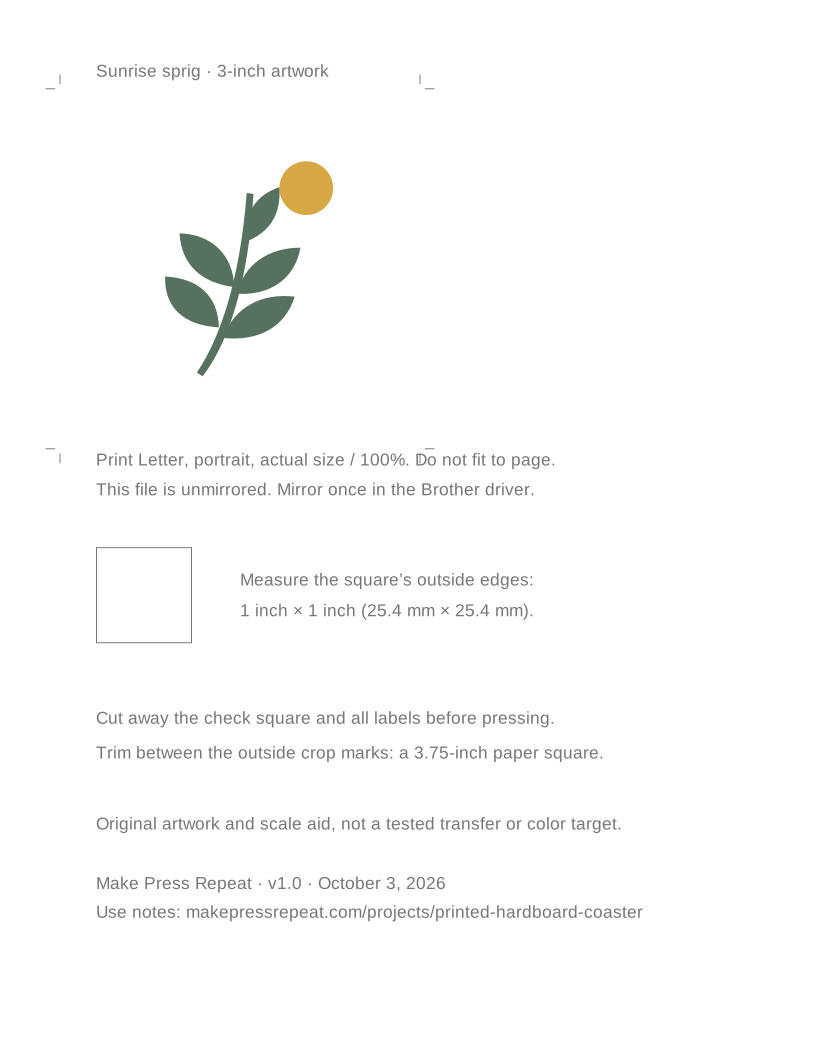

The use terms and file notes allow resizing and use on personal or commercial finished physical projects. Standalone digital resale or redistribution is not included. No supplier artwork, template or logo is reproduced. The PDF embeds its label font; the art-only SVG contains no fonts.
What one attempt consumes
The supply list includes two individual blanks so there is a second piece available after the first attempt. Unisub’s catalog quantity is 40; distributor packaging may differ. One attempt uses one blank, one Letter transfer sheet, two pieces of heat tape and fresh protective paper above and below the coaster. The exact tape length, protective-sheet dimensions and ink consumed depend on your setup and have not been measured. A repeat uses fresh consumables. The printer, press, scissors, cloth and gloves are reusable.
The paper line identifies one 100-sheet retail pack, not 100 sheets consumed per coaster. Brother’s four in-box ink cartridges can satisfy the ink lines while usable ink remains; they are not an instruction to buy four replacements. Use the project pricing calculator with your actual pack prices and per-attempt consumption. There is no verified project total, print yield or profit claim.
Why these sources are combined
Unisub’s current coaster instructions explicitly include #5677 and give the unambiguous time range. Its exact-item guide adds strong pressure and immediate transfer removal before cooling. That older page has malformed time notation, so the current guide supplies the duration. Neither identifies a press SKU.
The manufacturer product record establishes identity and outside dimensions. Xpres’s coaster tutorial supports mirroring for a coated-front-face transfer as general guidance; its separate sandwich is not used here. Manufacturer-authored care advice supports gentle surface cleaning, not a dishwasher certification. These pages were checked October 3, 2026. No published date is inferred from a copyright footer.
For printer-dialog details, follow the Brother SP1 Windows first-print guide. Compare this printed route with the Cricut cut-sheet coaster, which needs no sublimation printer.
Page address: https://makepressrepeat.com/projects/printed-hardboard-coaster
Make something next
Make a Cricut Infusible Ink square coaster
Source-documented workflow · not hands-on tested
Make a black cut-sheet design on one Cricut square coaster. Use a cutting machine and a compatible flat press; no printer needed.
View project planMake a Cricut Infusible Ink mug
Source-documented workflow · not hands-on tested
Make a blue cut-sheet design on Cricut’s white 12 oz mug with Joy Xtra and Mug Press. No printer needed.
View project plan