Artwork requirements
Confirm and measure the usable coated face. Ask MakerFlo to confirm the coated boundary, then measure it on the actual coaster before sizing the transfer; the listed 4 × 4 in figure is the outside size, not a usable artwork boundary.
- Use one design for the coated face. The demonstration trims excess white border from its selected transfer.
- Confirm the usable coated area with MakerFlo before setting final artwork dimensions; the published 4 × 4-inch figure is the coaster's outside size.
- Print the image orientation needed for the demonstrated image-side-down placement. The video does not state whether to mirror the file.
The source set does not specify an imageable area or a maximum artwork size for this coaster. Do not use the outside dimensions as a print boundary.
Two supplier details remain open before final art: the usable coated boundary and whether this exact coaster transfer file should be mirrored. The demonstration does not answer either question.
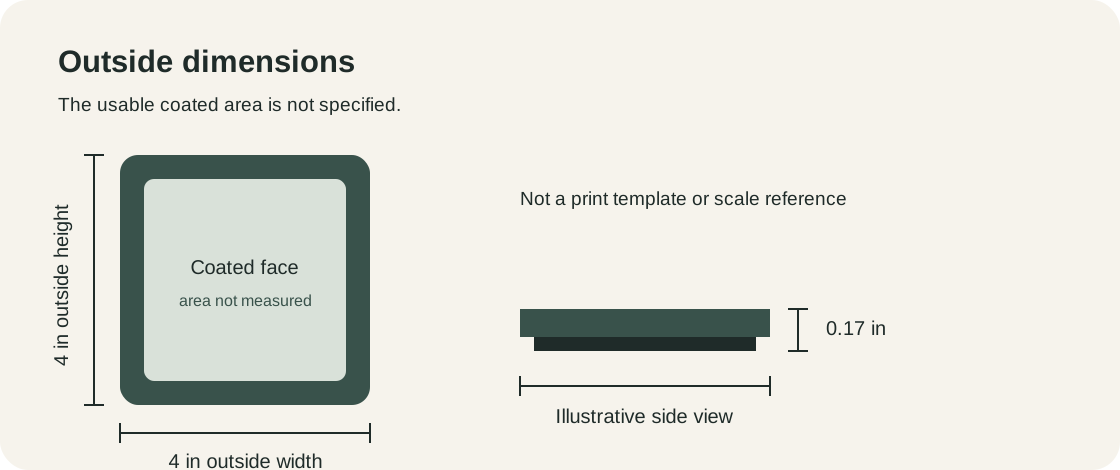
The original diagram labels only the blank's outside dimensions and is not a template or scale reference.
Epson's F570 Letter auto-sheet path has a calculated nominal interior of 8.26 × 10.76 inches; driver and application settings can reduce it. This printer bound does not establish the coaster's artwork area.
Source: MakerFlo: Sublimation Coaster
This project follows MakerFlo's 2023 leatherette coaster demonstration using its Sublimation Coaster and Mini Heat Press with a 7 × 5-inch plate. The BOM quantity of one means one 12-pack; use one coaster from it for the test and one for the final item. The coaster is a 4-inch square PU leather blank with a rigid backing, a black leatherette bottom, and a sublimation coating. Those outside measurements do not identify the imageable face, so the artwork target remains unknown until the supplier confirms it.
Confirm the blank and artwork area
The MakerFlo product page identifies the coaster as sublimation-coated and lists the outside dimensions as 4 × 4 × 0.17 inches. It does not provide a maximum artwork size or measured imageable area. Ask the supplier for that boundary before preparing final artwork; do not use the square's exterior size as a print target.
The original video demonstrates one design side and trims extra white border from the transfer. It places the printed image against the coaster and uses heat-resistant tape at the corners to reduce movement, while describing tape as optional for that example. It does not state whether the art file should be mirrored or define the usable coated boundary. Ask MakerFlo about both before preparing final art.
Print with a documented paper path
The bill of materials uses an Epson SureColor F570, genuine Epson T49M ink, and MakerFlo 8.5 × 11-inch sublimation paper. MakerFlo lists the F570 as compatible with that selected paper. Epson's User's Guide lists Letter sheets for the F570 auto sheet feeder and specifies 0.12-inch margins on every edge. That produces a calculated nominal interior of 8.26 × 10.76 inches; the driver, application, operating system, and layout may reduce the actual imageable bounds.
The F570 ships with initial ink bottles for setup, and Epson notes that some ink is used while charging the print head. The four ink colors below describe the required CMYK system; they do not imply that four extra bottles must be purchased for a new printer. Check the selected printer package and its remaining ink when calculating costs. Use the project cost worksheet with your actual paper, ink, blank, and labor inputs.
Keep the demonstration setting and chart separate
MakerFlo's dated demonstration names this exact coaster and Mini Heat Press 7 × 5. It uses 365°F for 50 seconds with steady medium pressure from the handheld press. MakerFlo's blank product page separately states “60 seconds at 380 degrees” without naming a temperature unit, and its undated generic Mini Press chart lists 380°F for 60 seconds at Medium. These instructions differ in source scope and detail. This project preserves each statement and uses the exact named demonstration as its documented example; confirm the current blank and press instructions before making a batch. No transfer quality or setting was tested independently for this guide.
Follow the source sequence
Print one design at a size confirmed for the usable coated face, then trim excess white border as shown in the video. Place the printed image face down against the coaster; corner tape is optional in the demonstration. Cover the transfer with a Teflon sheet. The video does not specify a particular cover brand or size. The 12 × 16-inch HTVRONT PTFE sheet in the materials list is one example sold for sublimation use, not a product MakerFlo specifies for this press.
Set the named press to 365°F and 50 seconds. Hold it steadily with medium hand pressure for the cycle. Remove the cover, tape, and transfer paper carefully after pressing. MakerFlo warns against scratching the leatherette when lifting tape, says its demonstrated coaster does not need a sealer, and suggests using a heat glove if the blank is too hot to handle. The video does not specify a cooling interval, so this page does not invent one.
MakerFlo recommends testing materials before a final project. Record the blank, press, paper, print dimensions, setting source, and result from the first coaster; consult the current supplier instructions before adjusting any value for a second attempt. For broader press selection, see the heat press guide; for printer orientation and media controls, use the printer settings guide. The design-size helper can work from dimensions you already have, but it cannot discover the coaster's coated area.
Page address: https://makepressrepeat.com/projects/coated-coaster
Sources and review date
Manufacturer and supplier pages were checked on 2026-09-23. The demonstration is dated November 8, 2023. Directions and settings are paraphrased, and the project describes supplier instructions rather than a hands-on result. The diagram is original.
- MakerFlo Sublimation Coaster: identity, material, coating, outside dimensions, and its separate unit-unspecified time statement.
- MakerFlo Sublimation 101: demonstration title/date, named products, and exact coaster product pages.
- MakerFlo leatherette coaster demonstration: named-process setting, placement, optional corner tape, Teflon cover, pressure, removal, no-sealer statement, and conditional heat-glove advice.
- MakerFlo Mini Heat Press 7 × 5: plate dimensions, sublimation use, controls, safety and test advice, and conflicting purchase widgets.
- MakerFlo sublimation settings chart: generic Mini Press row and general test caveat; kept separate from the exact named demonstration.
- Epson SureColor F570 and its User's Guide: model, Letter-sheet feed path, calculated margins, CMYK ink colors, and initial ink bottles.
- MakerFlo sublimation paper, 8.5 × 11 inches, 100 sheets: exact paper option, process, and F570 compatibility.
- HTVRONT PTFE sheets, 12 × 16 inches, 3-pack: example protective sheet size and listed sublimation use; stock signals conflicted at check.
- MakerFlo wide sublimation heat tape and MakerFlo heat-resistant glove: examples for optional transfer tape and heat protection.
Continue with the MakerFlo tumbler project or review the blank compatibility guide.